Yoga Poses to Soothe Knee Pain Naturally
Regularly practicing Yoga poses, you can address the root causes of knee pain, such as muscle imbalances, tightness, and poor posture, while improving flexibility and strength in the lower body. Always listen to your body and avoid pushing yourself too hard, especially if your knee pain is intense or chronic. If in doubt, consult with a yoga therapist or healthcare provider to tailor a practice to your specific needs.
2/19/2025


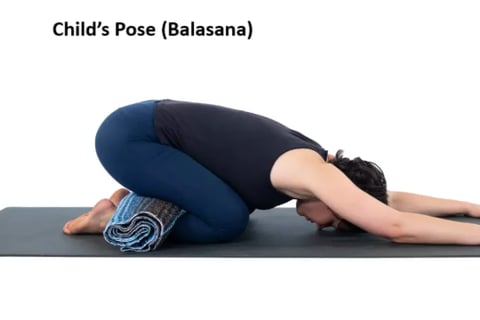
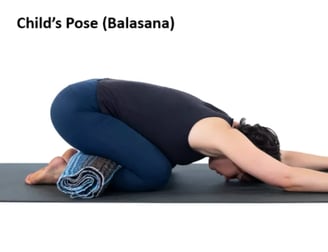
1. Child’s Pose (Balasana)
Benefits: Child’s Pose is a wonderful, restorative posture that stretches the thighs, knees, and lower back while offering a calming effect. It’s particularly useful if you're dealing with stiffness in the knees or experiencing discomfort due to tightness in the hips and legs.
How to Perform:
Start by kneeling on your mat, with your toes touching and knees spread wide apart, about the width of your hips or slightly more for a deeper stretch.
Gently sit back onto your heels, allowing your torso to fold over your thighs. Let your forehead rest on the mat (you can also place a pillow under your head if it’s uncomfortable).
Extend your arms forward on the floor, with your palms facing down to deepen the stretch. If that’s too much, you can relax your arms by your sides with palms facing upward.
Breathe deeply into the back of your body, allowing the chest and back to expand with each inhale. Stay in this position for 30 seconds to 1 minute, focusing on letting go of any tension in the body, particularly the knees.
This pose can be especially effective after a long day or intense workout, as it helps release tension in the whole body, including the knee area.
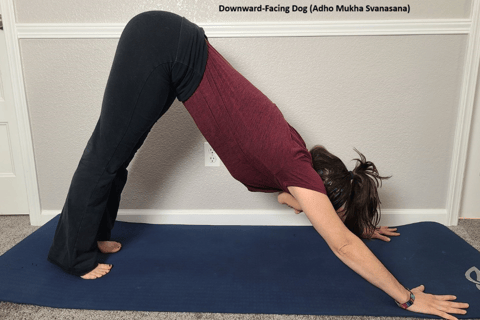
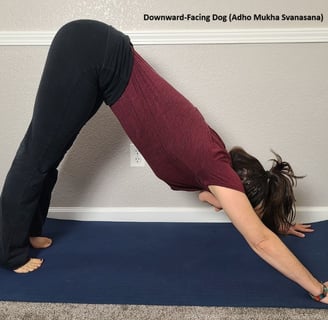
3. Downward-Facing Dog (Adho Mukha Svanasana)
Benefits: Downward-Facing Dog is a full-body stretch that relieves tightness in the hamstrings, calves, and knees. By shifting the weight through your arms and legs, it not only lengthens the back and legs but also improves the alignment of the hips, which can help reduce pressure on the knees.
How to Perform:
Start in a tabletop position with your wrists directly under your shoulders and knees under your hips. Spread your fingers wide for stability.
Slowly lift your hips toward the ceiling, keeping your legs straight (though a slight bend in the knees is perfectly fine if you have tight hamstrings). Press your heels toward the ground, but they don’t need to touch.
Keep your head between your arms, with your neck relaxed. Make sure your back remains straight, engaging your core to avoid excessive arching in your lower back.
Hold the position for 30 seconds to 1 minute, breathing deeply to release any tension in your legs, especially around the knee area.
If you’re new to this pose, don’t worry about getting your heels to the floor right away. Just focus on creating a long line from your hands to your feet.
knee pain relief yoga poses:
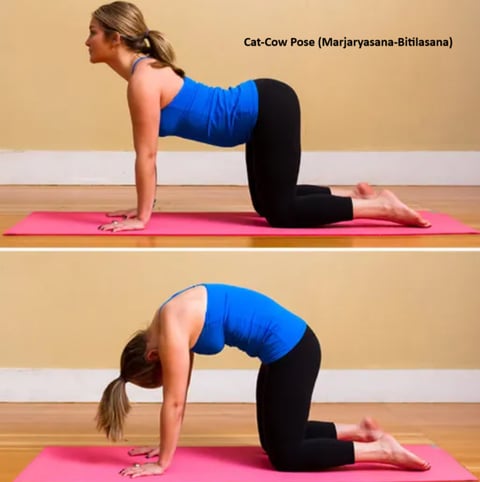
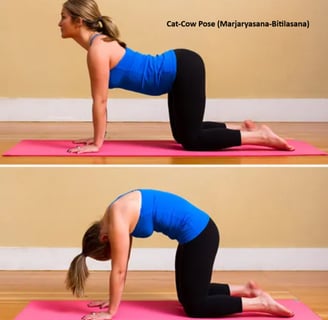
2. Cat-Cow Pose (Marjaryasana-Bitilasana)
Benefits: The Cat-Cow flow is a gentle movement that helps mobilize the spine while stretching the muscles around the knees and hips. It encourages flexibility and lubrication of the joints, including the knees. The dynamic motion can help relieve stiffness and improve circulation to the knee area.
How to Perform:
Begin on all fours with your wrists aligned directly under your shoulders and your knees under your hips.
As you inhale, arch your back, lift your tailbone and chest toward the ceiling (this is Cow Pose). Keep your elbows straight and let your belly drop towards the floor. This helps to stretch the front of the body, including the thighs and knees.
As you exhale, round your spine and tuck your chin toward your chest (Cat Pose). Draw your belly button toward your spine as you press into the floor with your hands and knees, which helps activate the muscles around your knees and lower back.
Flow between these two movements with your breath for 10–15 rounds, moving slowly and mindfully. The movements should feel fluid and should not cause any strain.
This pose helps maintain the mobility of your spine and hips, which can have a positive impact on your knees by keeping the whole body aligned.
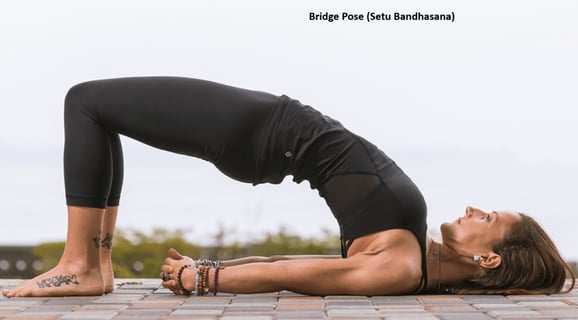
4. Bridge Pose (Setu Bandhasana)
Benefits: Bridge Pose strengthens the glutes, hamstrings, and lower back muscles while providing a gentle stretch to the quadriceps and hip flexors. This can relieve knee pain by addressing the muscle imbalances that contribute to discomfort in the knee joint.
How to Perform:
Start by lying on your back with your knees bent and your feet flat on the floor, hip-width apart. Your arms should rest by your sides with palms facing down.
Press your feet into the floor, and slowly lift your hips toward the ceiling while keeping your thighs parallel to each other. Avoid letting your knees splay out to the sides.
If you want a deeper stretch, you can clasp your hands underneath your back and press your arms into the mat to lift your hips higher.
Hold the pose for 20–30 seconds, squeezing your glutes and thighs to engage the muscles around the knees.
Lower your hips slowly back down, and repeat 5–8 times.
Bridge Pose is great for activating the muscles around your knees while also improving hip mobility, which is crucial for knee health.

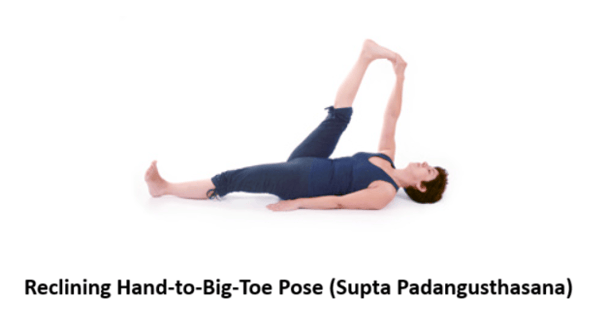
5. Reclining Hand-to-Big-Toe Pose (Supta Padangusthasana)
Benefits: This pose targets the hamstrings, calves, and even the lower back, which can become tight and contribute to knee discomfort. By stretching these areas, it promotes better flexibility and mobility in the legs, thus reducing the strain on your knees.
How to Perform:
Lie on your back with your legs extended and your feet flexed.
Slowly raise one leg and hold the big toe with your hand (you can use a yoga belt around your foot if it’s difficult to reach your toe). Keep your other leg extended on the floor, with your foot flexed.
Try to straighten your lifted leg as much as possible without forcing it, maintaining a gentle stretch in your hamstring. You should feel a stretch along the back of your leg.
Hold for 30 seconds to 1 minute, then switch legs.
This pose is excellent for lengthening the hamstrings, which are often a source of knee tightness, especially in those who have desk jobs or spend a lot of time sitting.


6. Warrior I (Virabhadrasana I)
Benefits: Warrior I builds strength in the legs, particularly the thighs and calves, while also stretching the hip flexors and quadriceps. Strengthening these areas around the knee helps relieve strain and provides better support for the knee joint.
How to Perform:
Begin standing with your feet about 3–4 feet apart. Turn your right foot out to a 90-degree angle and bend your right knee, ensuring it aligns with your ankle (don’t let the knee extend past the toes).
Extend your arms overhead, with your palms facing each other. Keep your shoulders relaxed and chest lifted.
Press through your feet, especially the back leg, to keep your legs active and strong.
Hold the position for 30 seconds, then switch sides.
Warrior I helps create balance between strength and flexibility, particularly in the legs and hips, which are essential for healthy knee function.
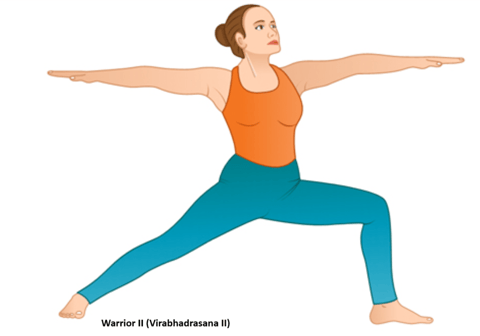
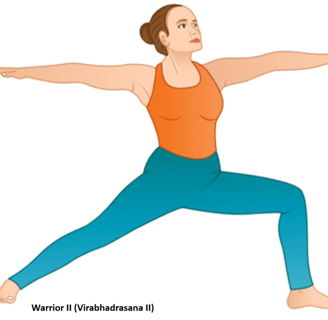
7. Warrior II (Virabhadrasana II)
Benefits: This powerful pose strengthens the legs, engages the core, and stretches the hips and inner thighs. By promoting overall lower body strength, Warrior II helps stabilize the knee joint, reducing the risk of knee pain.
How to Perform:
From standing, spread your feet wide, about 3–4 feet apart. Turn your right foot out 90 degrees and your left foot slightly inward.
Bend your right knee so that it’s aligned over your ankle, and keep your left leg straight.
Extend your arms out to the sides at shoulder height, with palms facing down. Keep your shoulders relaxed and your gaze focused over your right hand.
Hold for 30 seconds to 1 minute, then switch sides.
Warrior II is especially beneficial for building strength in the quads, hamstrings, and hips—all key areas for knee support.
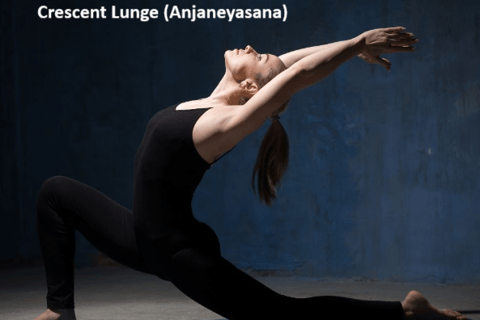
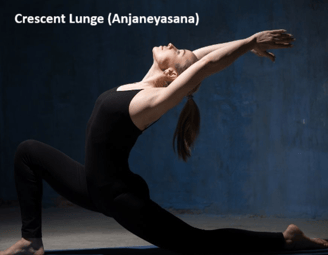
8. Crescent Lunge (Anjaneyasana)
Benefits: Crescent Lunge strengthens the legs and glutes, while also stretching the hip flexors, quads, and hamstrings. This dynamic stretch helps address muscle imbalances that can contribute to knee discomfort by opening up the hips and strengthening the core.
How to Perform:
Begin by stepping your right foot forward into a deep lunge position. Your left knee should be on the mat with your back leg extended.
Lift your torso upright and extend your arms overhead with palms facing each other.
Make sure your front knee is directly above the ankle and your hips are squared forward. You should feel a deep stretch in your hip flexors and a strengthening in the thighs and glutes.
Hold for 30 seconds to 1 minute, then switch sides.
This pose is wonderful for releasing tension in the hips, which can have a direct impact on knee health.
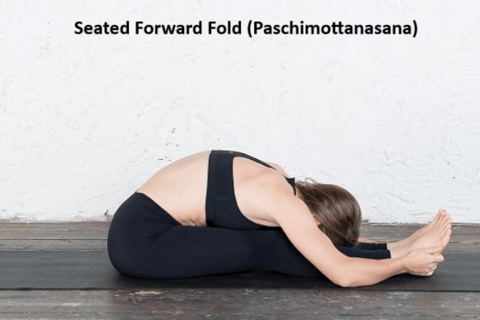
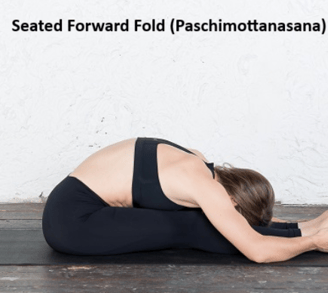
9. Seated Forward Fold (Paschimottanasana)
Benefits: This seated pose targets the hamstrings and lower back, promoting flexibility and releasing tightness in the legs that can affect the knees. It can also help calm the mind and improve overall posture.
How to Perform:
Sit with your legs extended straight in front of you. Flex your feet, ensuring they’re parallel to each other.
Inhale and lengthen your spine. As you exhale, gently fold forward from your hips, reaching for your feet, ankles, or shins.
Avoid rounding your back too much. Instead, focus on hinging at your hips to maintain a long spine while deepening the stretch.
Hold the position for 30 seconds to 1 minute, breathing deeply.
A forward fold is excellent for releasing tension in the hamstrings, which are often a culprit in knee pain, especially if they're tight.
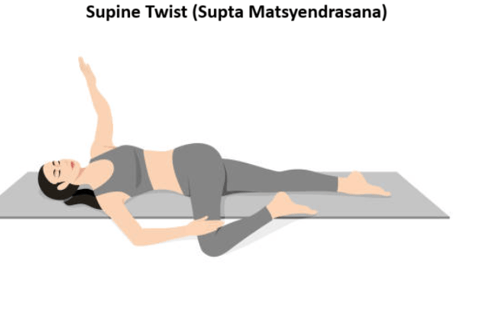
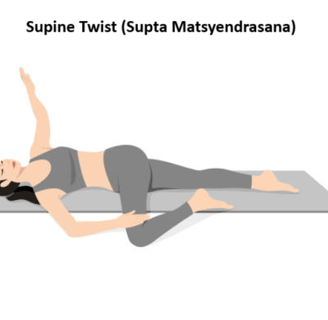
10. Supine Twist (Supta Matsyendrasana)
Benefits: The Supine Twist provides a gentle release for the spine, hips, and thighs. This deep stretch helps improve the flexibility of the lower back and hips, which can reduce pressure on the knees by restoring proper alignment.
How to Perform:
Lie on your back with your knees bent and feet flat on the floor.
Extend your arms out to the sides in a “T” shape, palms facing down.
Drop your knees to one side while turning your head in the opposite direction. Keep your shoulders grounded on the floor.
Hold for 30 seconds to 1 minute, then switch sides.
This twist releases tension in the lower back, hips, and thighs, indirectly helping the knees by encouraging better alignment in the whole body.
Health and Fitness
Health and fitness is a journey of balanced nutrition, regular exercise, and mindful well-being for a vibrant life..
Yoga
Meditation
contact@trustislife.com
© 2024. All rights reserved.